Thursday, 19 July 2012

AT&SF 31564 Box Car


This PS-1 box car was known on the AT&ST as a BX-57. However, for freight car aficionados one should note that the BX57 class should have a Gypsum running board that was unpainted galvanised steel. This is a Plano replacement etch I plan to use to replace the running board. I'm a bit surprised that Kadee haven't produced this variant of the running boards for their models, as I can't imagine that they haven't made back their investment costs yet?

In general any PS-1 box cars running in the late 1950s should have their tack boards placed in the lower position, since by the time they were built the trend was towards lower boards that train crew could reach from the ground. I suppose I could change this, which in this case would mean getting replacement doors, not sure I can be bothered?


All the bits cut out, with the running board applied using canopy glue.


Just showing the lateral running boards in the process of being applied. You can just see at the right hand edge the replacement etch at the brake wheel has also been applied. To finish off I retrieved the lateral running board grab rails from the Kadee moulding and glued them on using canopy cement.

All I have to do now is send this car off to the weathering shop.

Sunday, 1 July 2012

Operations 5: Lies, Damned Lies & Statistics


I have just got back from a week long work based conference, where I went to workshops and symposia to listen to learned professors either teach, or give overviews on their specialist field, and present research findings. I should add at this point that I'm not a researcher, professor, or statistician. My only role in all of this is to understand what the research implies for best practice, and how strong the evidence is.

I mention all of this as a preamble to a few comments that have arisen from various private conversations about the distribution of freight cars across the railroad networks of the North American continent.

When I started in the model railroad hobby the received wisdom was that one should base the number of freight cars per railroad on a rule of thumb that said anything between 25% to 35% would be the home railroad, and then the rest of the freight car models would be based on the connecting railroads, according to their size and proximity to the home railroad.

This paradigm has been replaced by the Gilbert-Nelson model that states that freight cars were seen in proportion to the national fleet. However, I would like to quote directly from Tony Thompson's post a couple of very salient points that people overlook:
"Of course, as they fully recognized, this can only be true of free-running cars like box cars, flat cars and gondolas which are not specially equipped, and is likely true only on main lines. A coal branch, for example, will obviously be quite different.
     They also recognized that certain factors can distort the general pattern. For example, interchange requirements or pool agreements can change the data; so can “hostile” or competitive relations among railroads."
Taking the first paragraph first. My model railroad is based on a traction line that mostly ran passenger services with a few freight trains to service industries along the line. It is therefore not a mainline. I highlighted that part of the above quote to emphasise the importance of the caveat.

The second paragraph's importance is that it defines the confounding variables that can relate to specific presentations of a locale, or railroad.

I have used photographs to support some of the assumptions that I'm making for my freight car roster, because unlike a mainline railroad, freight trains on the North Shore were quite short, and rather than being in the position of being only able to see the first few cars in any train, I often have the luxury of seeing all the cars in the train. I may not be able to fully identify them all by type, but can get close to identifying the owning railroad though.

As for for my aims, I'm trying for verisimilitude rather than quantitative replication. So while I'm aware of the percentages, of freight car types per owning railroad, I'm not going to try and replicate them literally, because I can only have a very small number of models relative to the number required for a statistical representative numbers.

So statistics should be seen as guidelines, rather than rules per se.
  

Sunday, 17 June 2012

NCE Power Cab


Last weekend my partner bought me this to replace my Lenz Compact Digital Plus and ESU Mobile Control. I've had the latter two pieces for maybe eight years? I forget when I got them exactly, but a fair while ago as Jeff of Buffers was still alive.

Anyway, I've had my original set-up and have used it a bit over the years, first with my P4 layout Sands End, and now with my current project. For me the problem with the Lenz was that it is extremely limited in its functions and while the ESU corrected those failings, it suffered from a feature I didn't like. Namely the reverse switch was combined with the rotary dial for speed control. One had to push down on the rotary dial to change direction.

I inevitably would rotate the dial at the same time. I hated it.

So, I have admired the NCE units for a long while, and have coveted one for myself. Given the the current layout will only ever have one locomotive (okay a pair in consist mode will be needed) running at a time, I felt that the Power Cab really met my needs. If this proves not to be the case as and when the elevated line is put into place, then I will be able to upgrade it using their SB3 Smart Booster.

Plan is to install it sometime soon so that I can start running trains, especially now as I have 26 freight cars up and running to switch.


Friday, 15 June 2012

American Freight Cars 4: Yet More Additions

Some more freight cars for my fleet, which represent the final push to get enough cars for operational variety, so I'm not expecting to add many more RTR models from now on; apart from the odd shiny new thing that catches this girl's eye. :-)


First up a brace of Atlas ACF ICC-105 11,000 gallon tank car, which I've just discovered may be too modern for my layouts period?


However, they do look nice, but further research as to their provenance is needed. I quite like tank cars and if truth be told I probably didn't need these, but they were shiny and I couldn't resist their siren call.


I found out that this model from Red Caboose of an SP prototype that was also made by ACF for the C&EI, and as I needed cars from this railroad I bought one.


For pretty much the same set of reasons I saw this Kadee PS-1 50 foot double door box car that I thought looked really shiny, so I snapped it up. I only need one more C&EI car for my roster, which in practical terms means I can stop looking for anymore cars from this railroad.


This another InterMountain AAR 1937 car in a livery that I needed for my representational need to have a typical selection box cars from those railroads whose cars would appear on my layout. Can't just have PS-1s roving the layout like herds of wildebeest on the plains of the Serengeti.


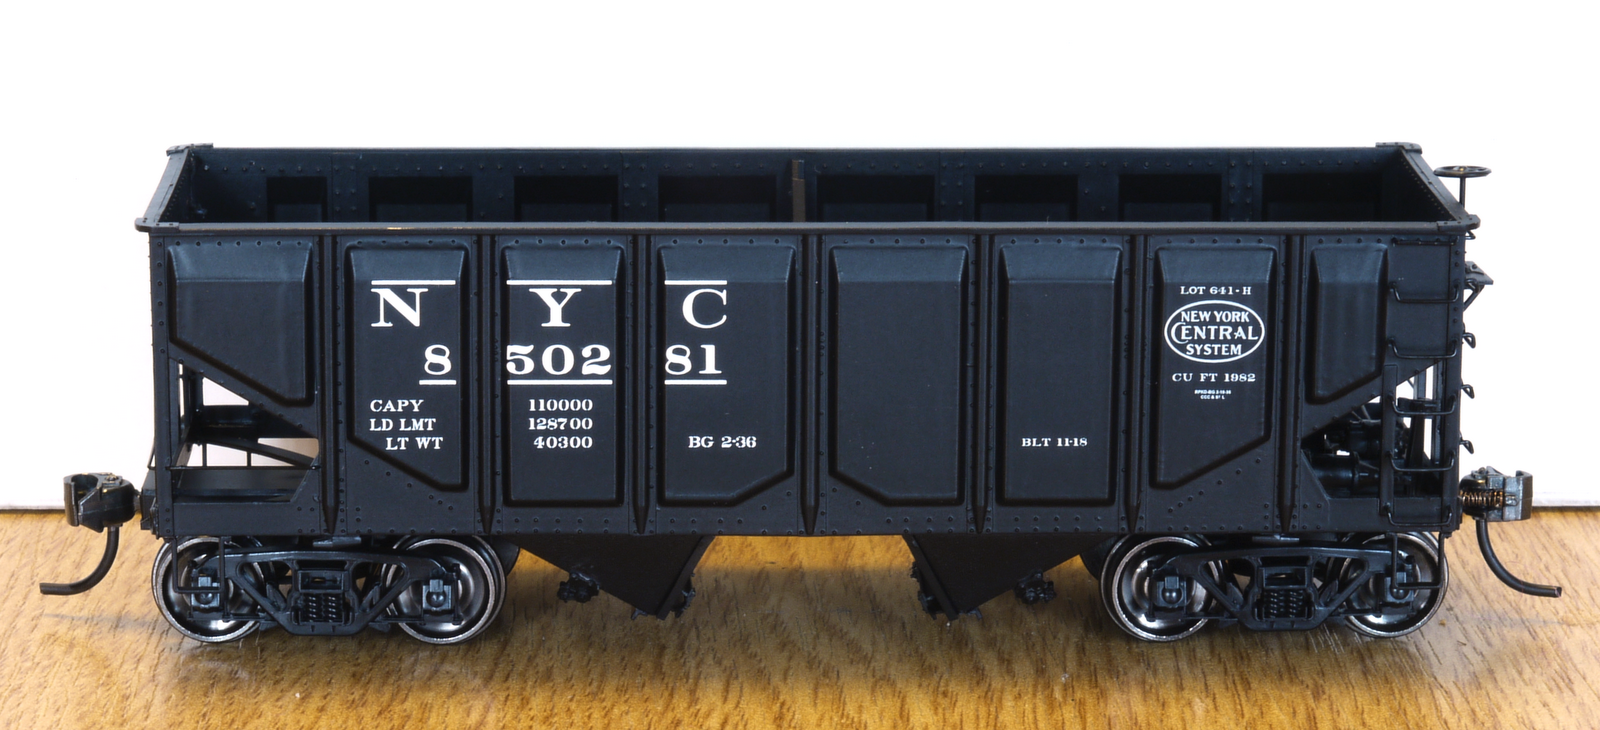
The New York Central System was the first North American railroad that I modelled seriously, for definitions of serious that allow for youthful indiscretions arising from ignorance of the subject matter. I fell in love with NYC Hudsons and the 20th Century Ltd, which captured my imagination from the romantic notion of "Centuries that pass in the night". Anyway, this is a rather nice InterMountain model.


Finally, this time round, an InterMountain Tichy Group hopper. I like the paneling variation of this car, which adds a bit of variety to my hopper fleet.

Wednesday, 13 June 2012

Thirteen Back Up


Saturday saw us down in Chatham, Kent, which is a 140 mile round journey for us, so not a show we go to often, but well worth the time it took. The Chatham show takes place in the historic dockyards, based in one of the sheds on the quay. Being semi-open to the elements it can be a bit cold, if the weather is inclement, which it was on Saturday. At least one trader was complaining of being cold.

Saw a lot of very nice layouts with a wide selection of scales with a good mix of British, American and European models. The latter often being visitors from abroad, which is quite common to the Chatham show. Bought a building kit, and was bought an NCE Power Cab by my partner, to replace my old Lenz Digital Plus, which was a bit basic for my needs.

Sunday we went to a BBQ, so didn't get much modelling done.

However, I did finally get my back order of wheels from Caboose Hobbies at the weekend. I have been spending sometime sorting out all the axles by length, before mounting them in the trucks of my freight cars that have been so long sans wheels.


Wednesday, 6 June 2012

CNS&M 459: Part 5

Well after about an hour and a quarters work I got this part back into shape.


I was recently asked how do I hold all the bits together to stop them falling apart. The simple answer is to use a jig. In this case a very simple jig that uses dress pins stuck into the board I solder on to hold everything in place. To get the coupler plate in the right place I used a coffee stirrer to keep the distance I wanted between the front solebar and the coupler plate.


As you can see here bits have fallen off. Do not panic, bits will fall off. Just take your time and re-solder them back-on later with spot solder joints. Unfortunately, one of the little stanchions that holds the cut lever in place pinged off never to be seen again. Drat. Also broke one of the grab irons, but as that is a simple piece of bent wire, it's not hard to replace.


Meanwhile, I ran the all the rest of the finished parts through the paint shop. Here is the main body painted red, and I will now mask the nose, window frames, and doors and paint her green.


Et voilĂ ...

Of course I've still to finish off the other frame assembly and paint it. So a bit of a half-finished botch up really, but I was on a roll.


So now to fabricating a replacement for the missing stanchion that holds the cut lever assembly on the front of the frame. There are three of these, so I'm going to use one of the remaining two as a template. First I soldered the spare on to a piece of scrap brass that was the right thickness, cleaned it up a bit, and then drilled the hole through.

Next I cut around it to get the rough shape, but leaving enough to hold the work with.


Okay, all I've got to do now is clean off the excess solder, reassemble the cut lever assembly onto the sub-frame and this part of the project is done & dusted.

I have to be honest, and admit that on Monday I had lost my Mojo over this. I spent most of the day distracting myself with other stuff, like going out for a meal and seeing the new Ridley Scot movie Prometheus, which was a welcome change. On Tuesday I was able to get back in the saddle and work on both this locomotive and #452. The point is, that patience and perseverance are what you need when doing something like this, and if you have enough of both then you can achieve whatever you set your mind to.